
What are automated checks?
Automated checks are a feature in Accessibility Insights for Windows that quickly checks an app for compliance with dozens of accessibility rules. It's easy to save the results to a file so you can share them with your team.
You can run automated checks on their own or as part of FastPass, and you can file issues directly from automated check failures.
Running automated checks
You can run automated checks on an entire app or on a selected element, and you can use a timer to run automated checks after a delay.
However the checks are triggered, it is important to ensure that the application is in a "steady state" while being checked. Scan results may be inconclusive when checks are performed while the UI is in transition.
Running automated checks on an entire app
Running automated checks on an entire app is the quickest way to identify issues.
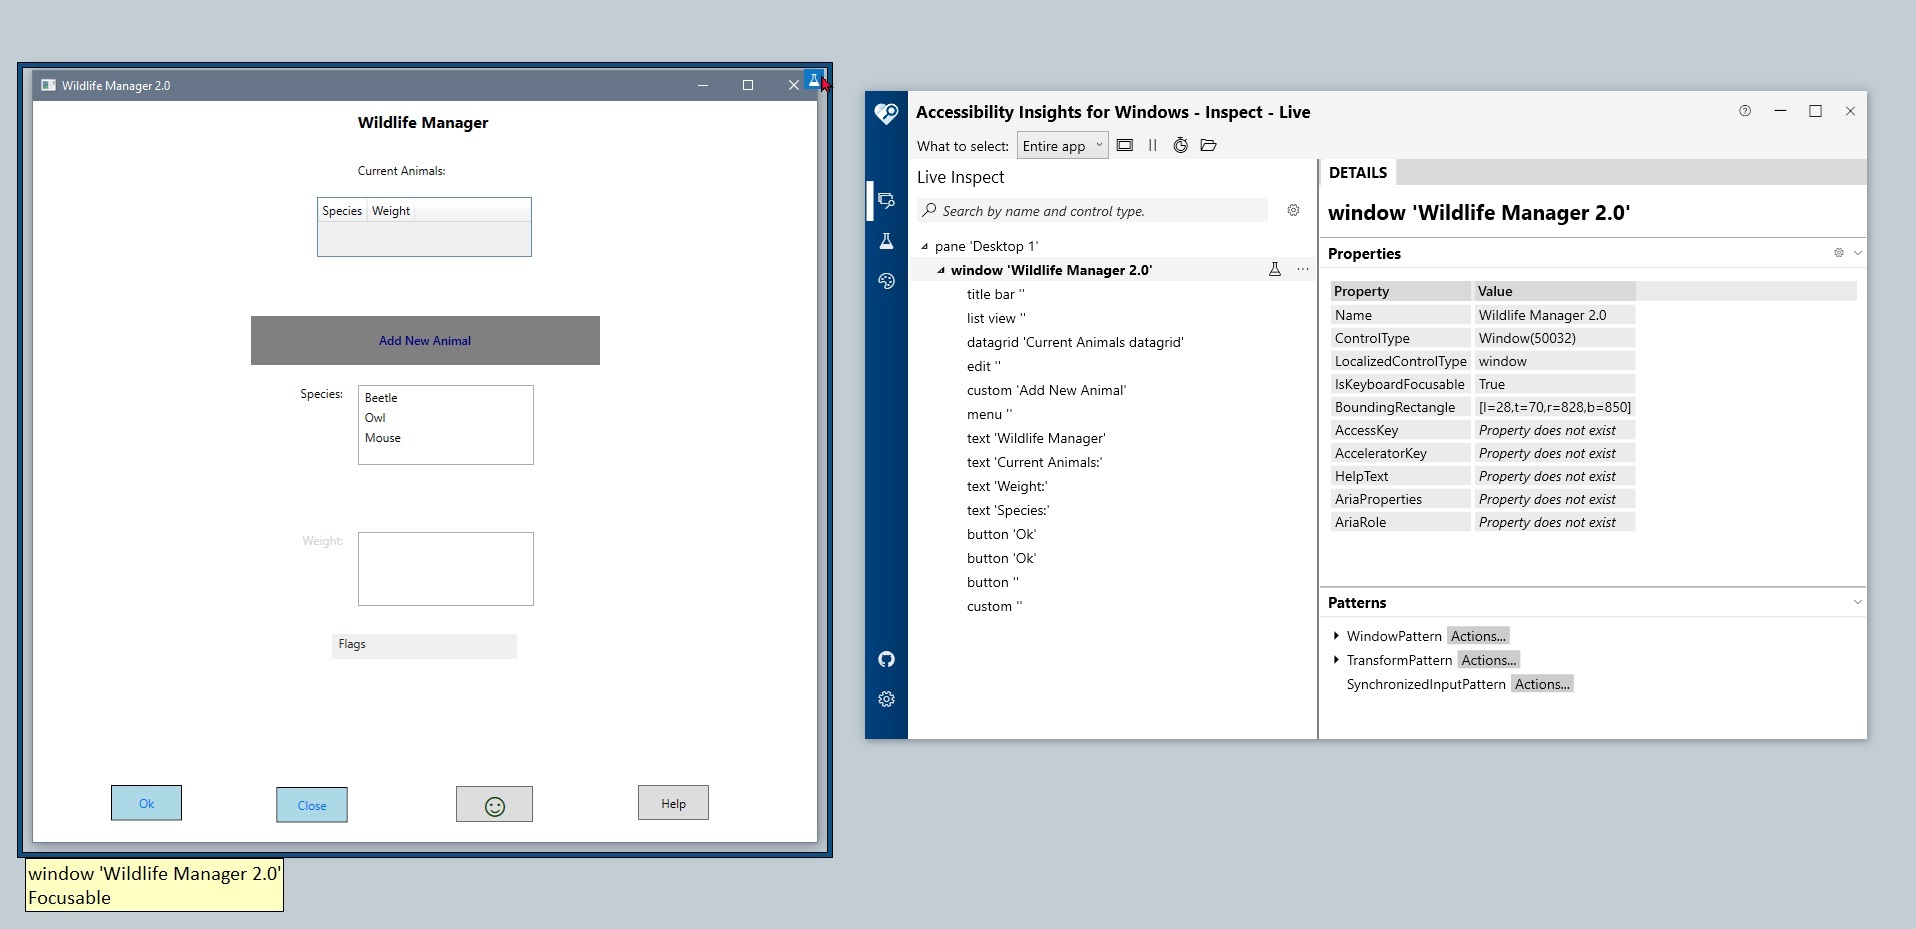
- In Accessibility Insights for Windows, go to the Live Inspect view.
- Under What to select, choose Entire app.
- Select an app, and then run automated checks on it: - Using a mouse: 1. Hover over the app. 1. Click the test icon that appears in the upper right corner of the app. or - Using a keyboard: 1. Press Alt+Tab on your keyboard to move focus to the app. 1. Press Shift+F8. (You can customize this keyboard shortcut.)
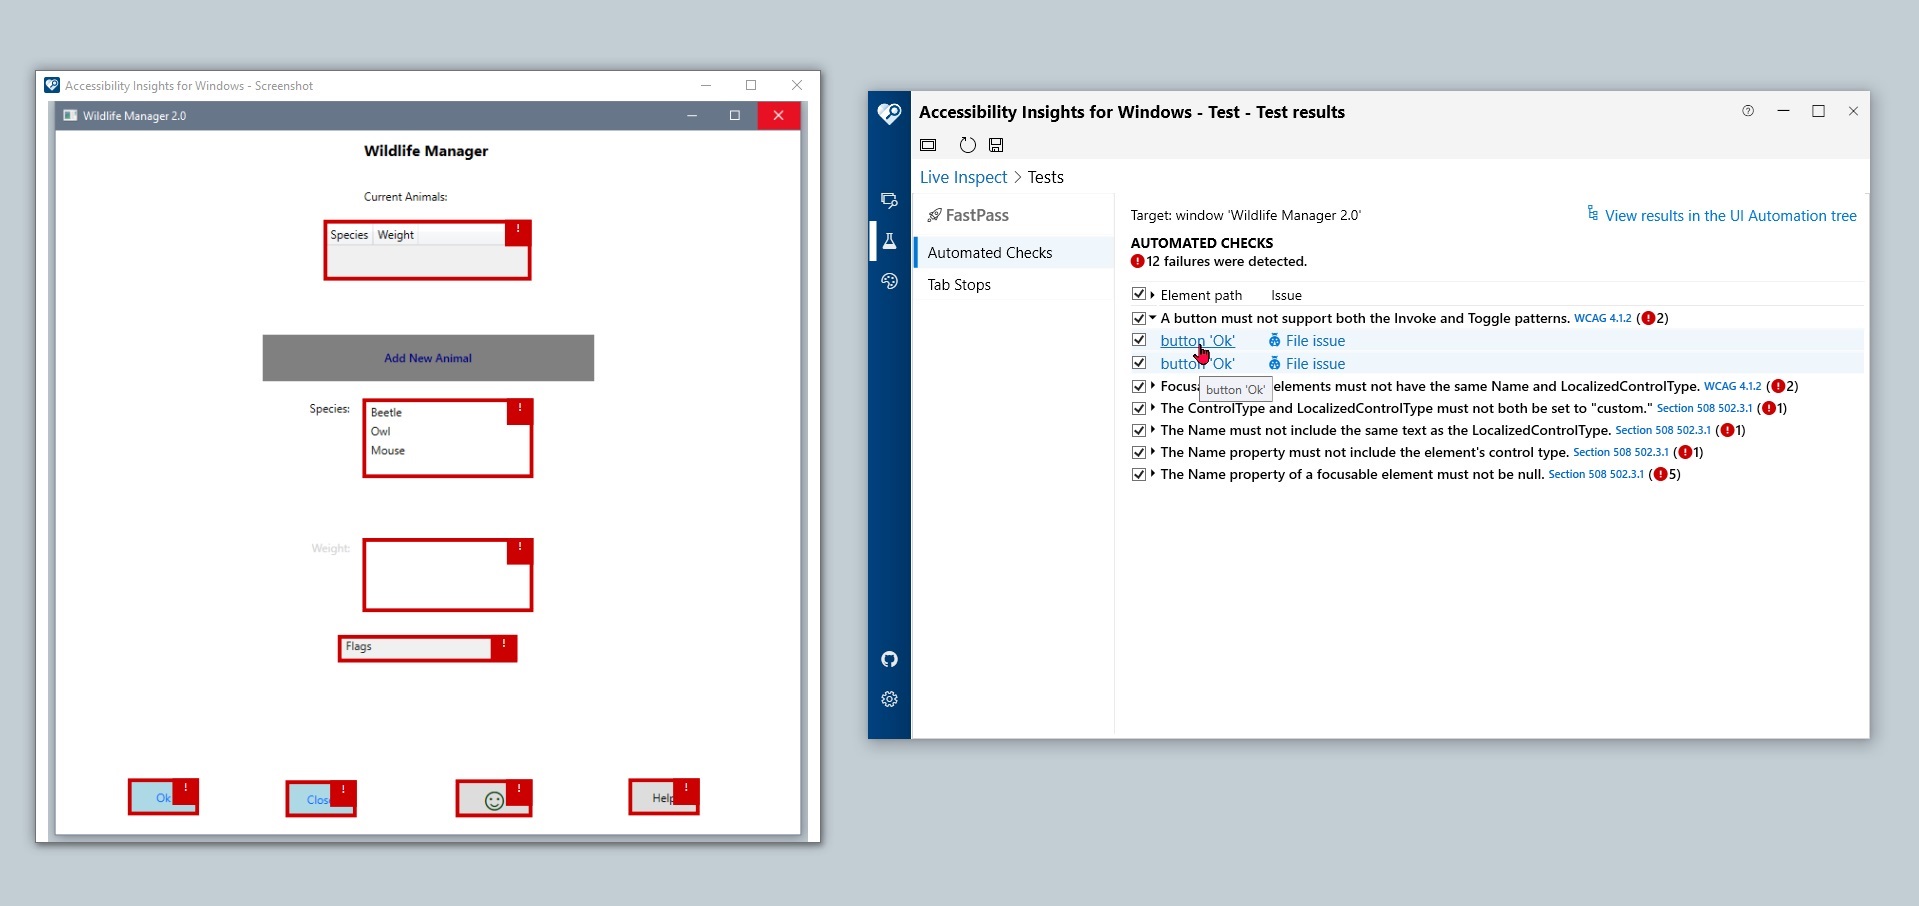
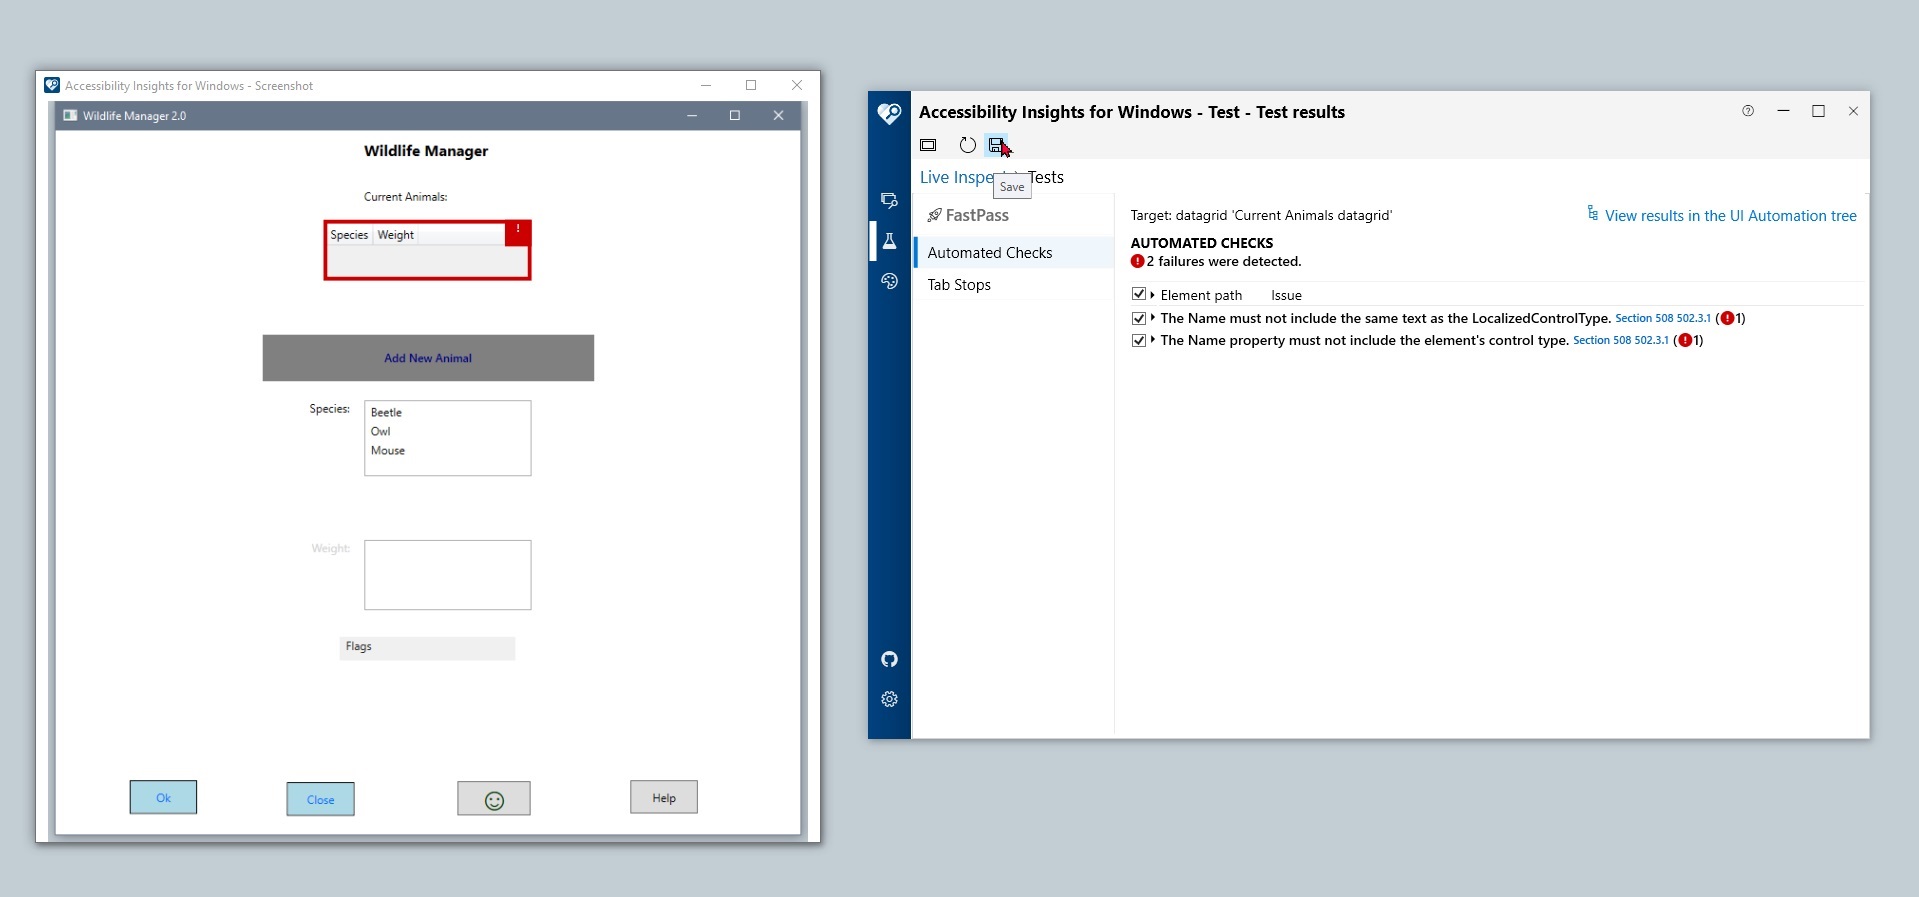
- Review the automated check results:
- A screenshot of the app appears, and all elements with failures are highlighted.
- Detailed results are shown in Accessibility Insights for Windows:
- Failed rules are shown in a tree grid.
- Where applicable, failed framework rules are shown in a separate tree grid.
- Each rule can be expanded to show its failure instances.
- Each failure instance has a link and a File issue button.
- Failed rules are shown in a tree grid.
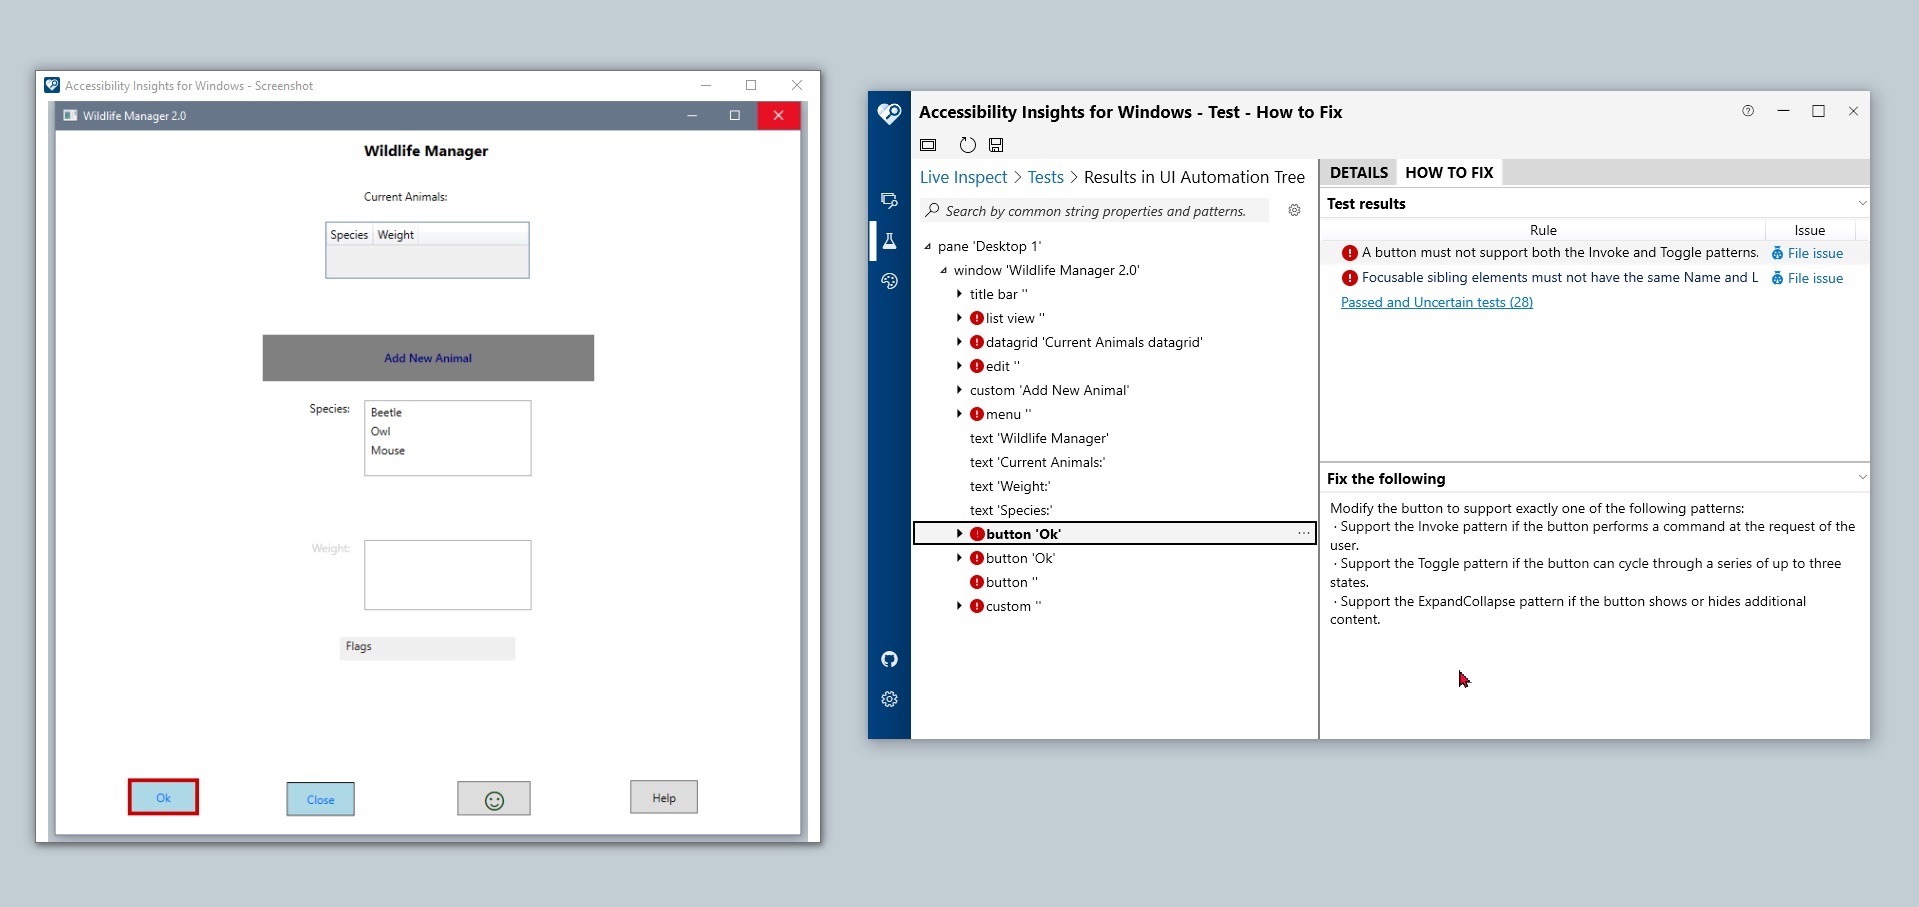
- Select a failure instance link to see details:
- The selected element is highlighted in the screenshot.
- In Accessibility Insights for Windows,
- The selected element is displayed in the context of the UI Automation tree.
- Rules failed by the element are listed.
- How-to-fix instructions are provided for each rule.
Running automated checks on a selected UI element
Running automated checks on a selected UI element scopes the results to that element and its children. Scoped results make it easier to identify a specific problem, for example when filing a bug. You can run automated checks on an element by selecting the element either (1) directly in the app or (2) in the UI Automation tree in Accessibility Insights for Windows.
Selecting an element in the app
Selecting an element directly in the app the quickest way to run automated checks on it.
- In Accessibility Insights for Windows, go to the Live Inspect view.
- Under What to select, choose Element.
- Select an element, and then run automated checks on it: - Using a mouse: 1. Hover over the element. 1. Click the test icon that appears in the upper right corner of the element. or - Using a keyboard (element must be focusable): 1. Move focus to the element. 1. Press Shift+F8.
Selecting an element in the UI Automation tree
Selecting an element in the UI Automation tree allows you to run automated checks on an element that isn't visible in the app. Also, this method allows you to use a keyboard to run automated checks on an element that isn't focusable.
- In Accessibility Insights for Windows, go to the Live Inspect view.
- Under What to select, choose Entire app.
- Select an element, and then run automated checks on it. - Using a mouse: 1. Hover over the app until the test icon appears in its upper right corner. 1. In the UI Automation tree, click the element. 1. Click the Test Element button. or - Using a keyboard: 1. Press Alt+Tab to move focus to the app. 1. Press Shift+F9 to bring Accessibility Insights for Windows to the foreground. (You can customize this keyboard shortcut.) 1. In the UI Automation tree, use the arrow keys or the Live Inspect keyboard shortcuts to move focus to the element. 1. Press Shift+F8, or Tab to the Test Element button and then press Enter.
Running automated checks with a timer
Accessibility Insights for Windows has a built-in timer that allows you to run automated checks after a delay. This feature can be handy when testing a UI component in a transient state, such as a combo box with its options expanded.
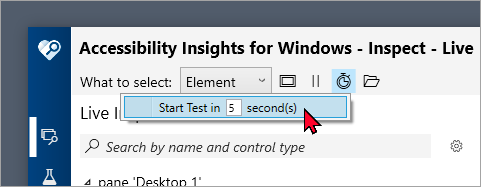
- In the command bar, select Timer.
- In the popup that opens, enter the number of seconds you'll need to get the UI into the desired state. (The default is 5.)
- Start the timer by pressing the Enter key or clicking the popup.
- In your target app, get the UI into the state you want to test, then wait. Automated checks will run when the timer reaches 0.
Saving automated check results
Saving automated checks to a file allows you to share the results with your team. For example, you can attach the file to a bug, send it as an email attachment, or upload it into a file storage system.
- Run automated checks using one of the methods described above.
- Save the file:
- Using a mouse, click Save, or
- Using a keyboard, press Ctrl+S.
- In the Save As dialog, choose a name for your file, and then select Save. The automated checks will be saved to a file with the .a11ytest file name extension.
Viewing automated check results
Anyone who has installed Accessibility Insights for Windows can view saved automated check results simply by opening the .a11ytest file. Accessibility Insights for Windows will open to the automated check results, and the app screenshot will open with failures highlighted.