
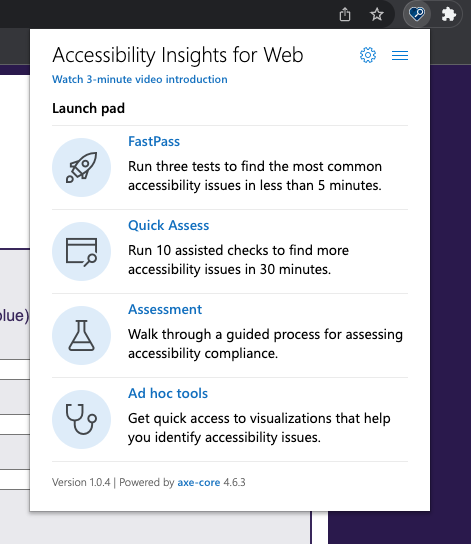
What is FastPass?
FastPass is a lightweight, two-step process that helps developers identify common, high-impact accessibility issues in less than five minutes.
- Automated checks - the tool automatically checks for compliance with dozens of accessibility requirements. Our automated checks are powered by axe-core.
- Assisted test for tab stops - the tool provides clear instructions, partial automation, and a visual helper that makes it easy to identify critical accessibility issues related to keyboard access, such as missing tab stops, keyboard traps, and incorrect tab order.
- Needs review - the tool provides instances that need to be reviewed by a human to determine whether they pass or fail.
We recommend developers run a FastPass before every check-in of UI code.
Notes:
- Completing a FastPass requires you to use standard keyboard commands and to visually identify interactive interface elements.
- Automated checks can detect some common accessibility problems such as missing or invalid properties. But most accessibility problems can only be discovered through manual testing. The best way to evaluate web accessibility compliance is to complete an assessment.
How to complete a FastPass
Get ready to test
-
In Chrome or the new Microsoft Edge, navigate to the page you want to test (aka the target page).
-
Open Accessibility Insights for Web:
- Select the extension icon.
or
- Press Alt+Shift+K (Option+Shift+K for macOS) (Customize this keyboard shortcut).
or
-
Use these keyboard commands:
-
Windows or Linux:
- Press Shift+Alt+T or F10 to set focus on the browser's tool bar.
- Press the Left Arrow key to set focus on the Accessibility Insights for Web extension.
- Press the Space key to open the extension.
-
macOS:
- Press ⌘+L to set focus on the browser's tool bar.
- Press the Tab key to set focus on the Accessibility Insights for Web extension.
- Press the Space key to open the extension.
-
The Accessibility Insights for Web extension will open to the Launch Pad.
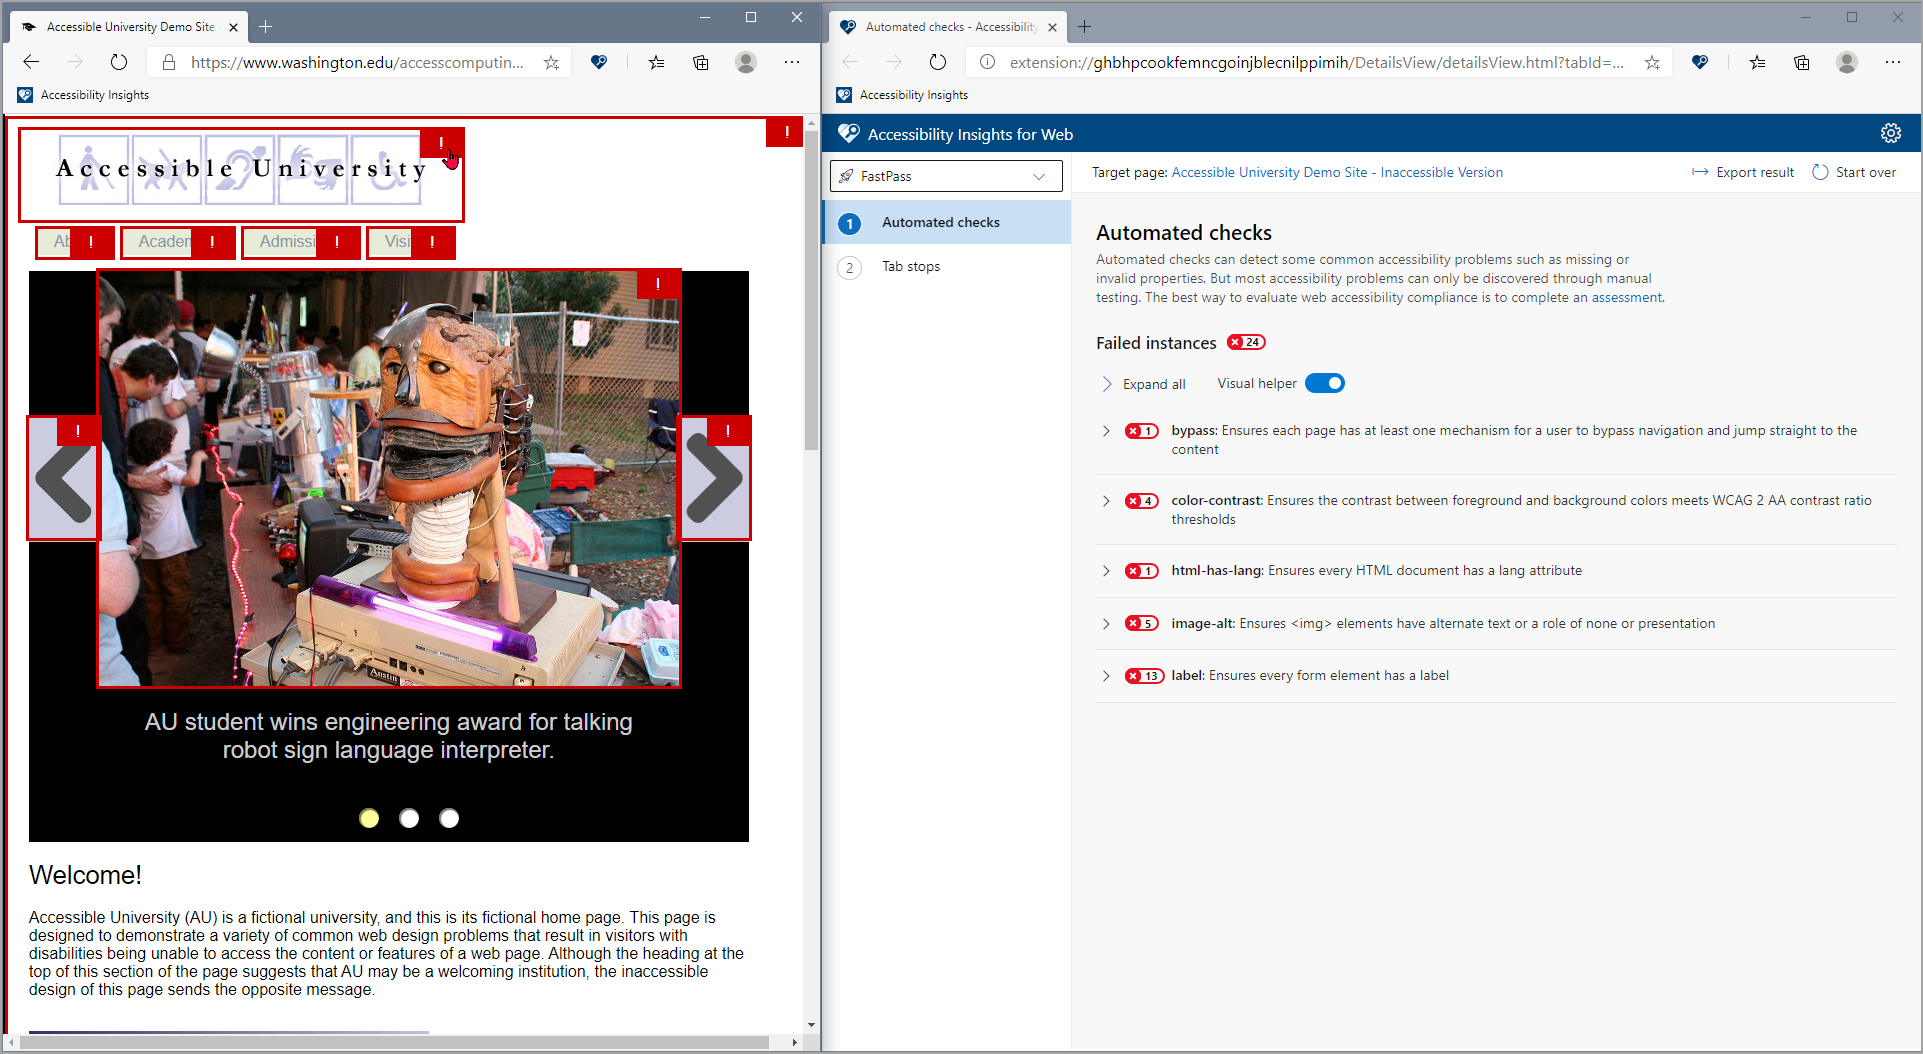
Run automated checks
-
In the Launch pad, select FastPass.
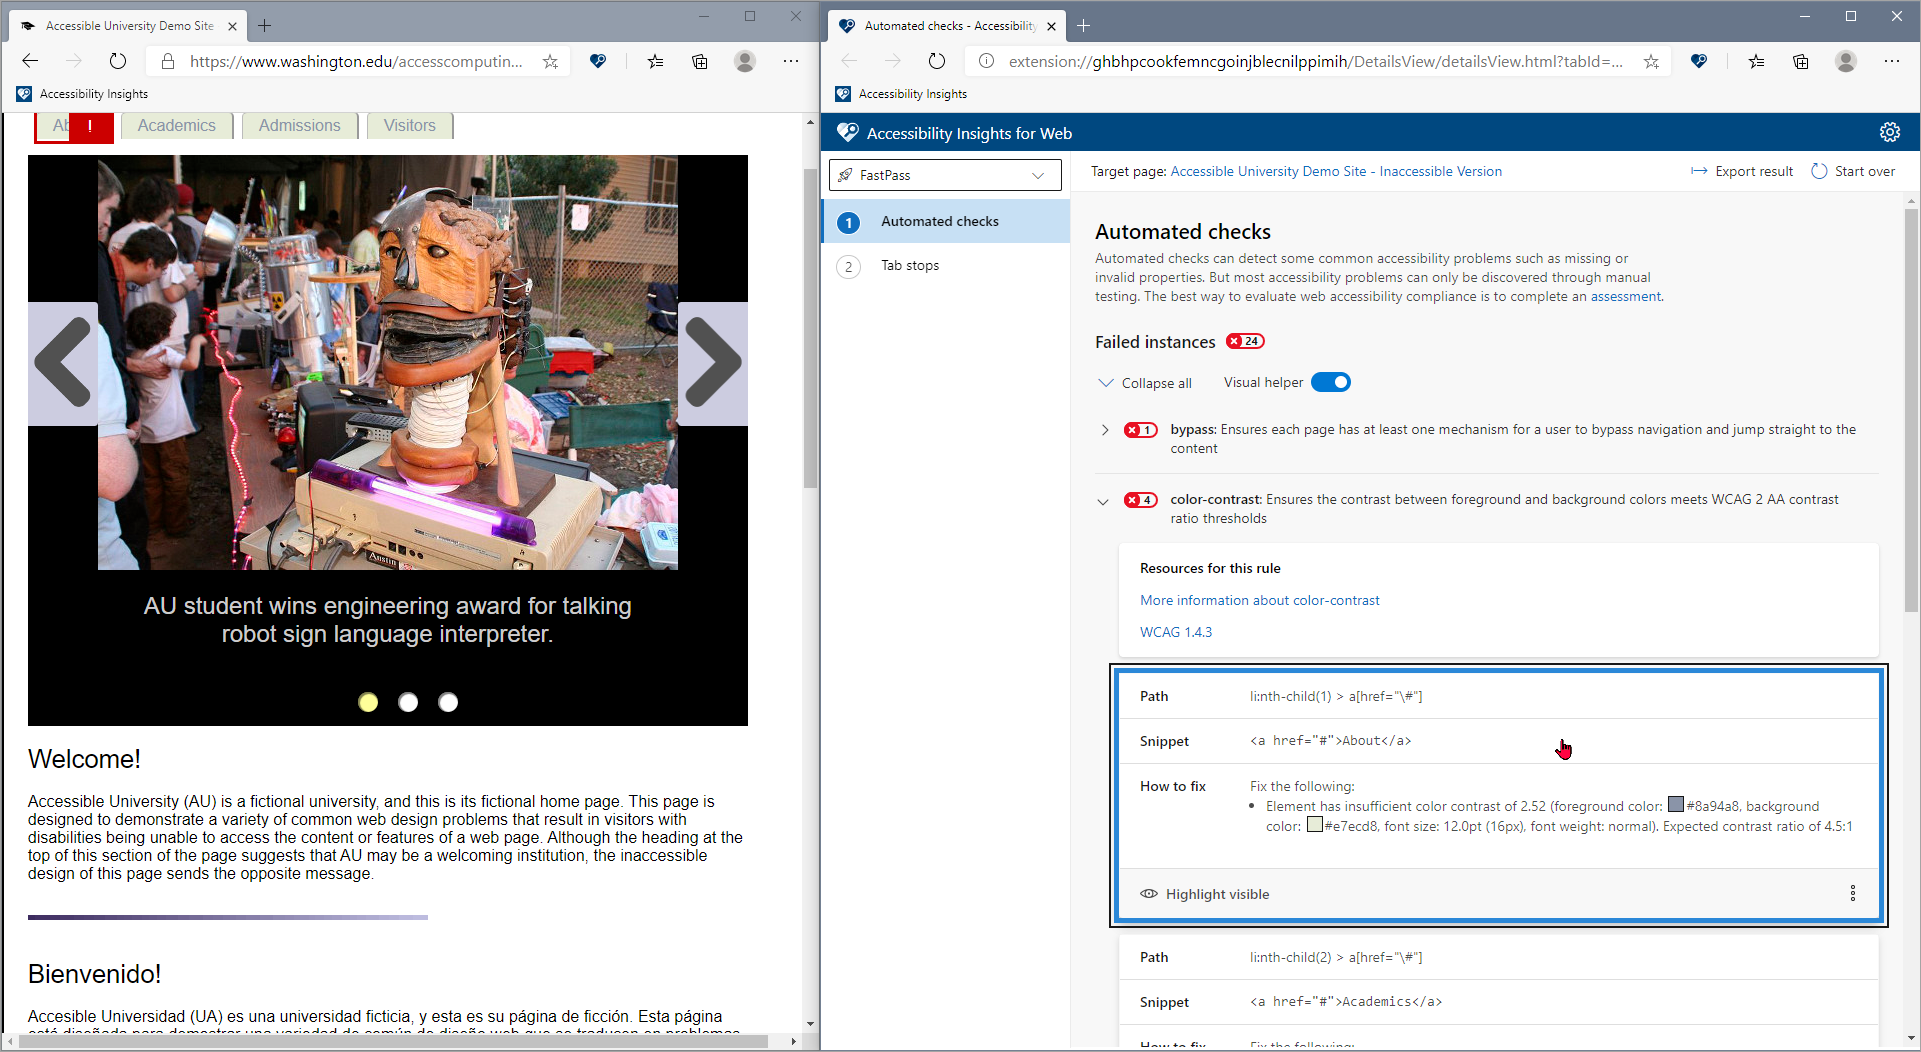
Automated checks will run on your target page. Individual failure instances will be highlighted directly in the target page, and the Accessibility Insights for Web page will open in a new browser window.
-
Review the automated check results.
You can review the automated check results directly in the target page or in the Accessibility Insights for Web page.
Review results in the Accessibility Insights for Web page
By default, the Accessibility Insights for Web page shows:
- The total number of failed instances
- A list of any accessibility rules that were violated
- The number of failed instances for each rule
- A visual helper toggle that allows you to quickly show or hide failure highlighting in the target page
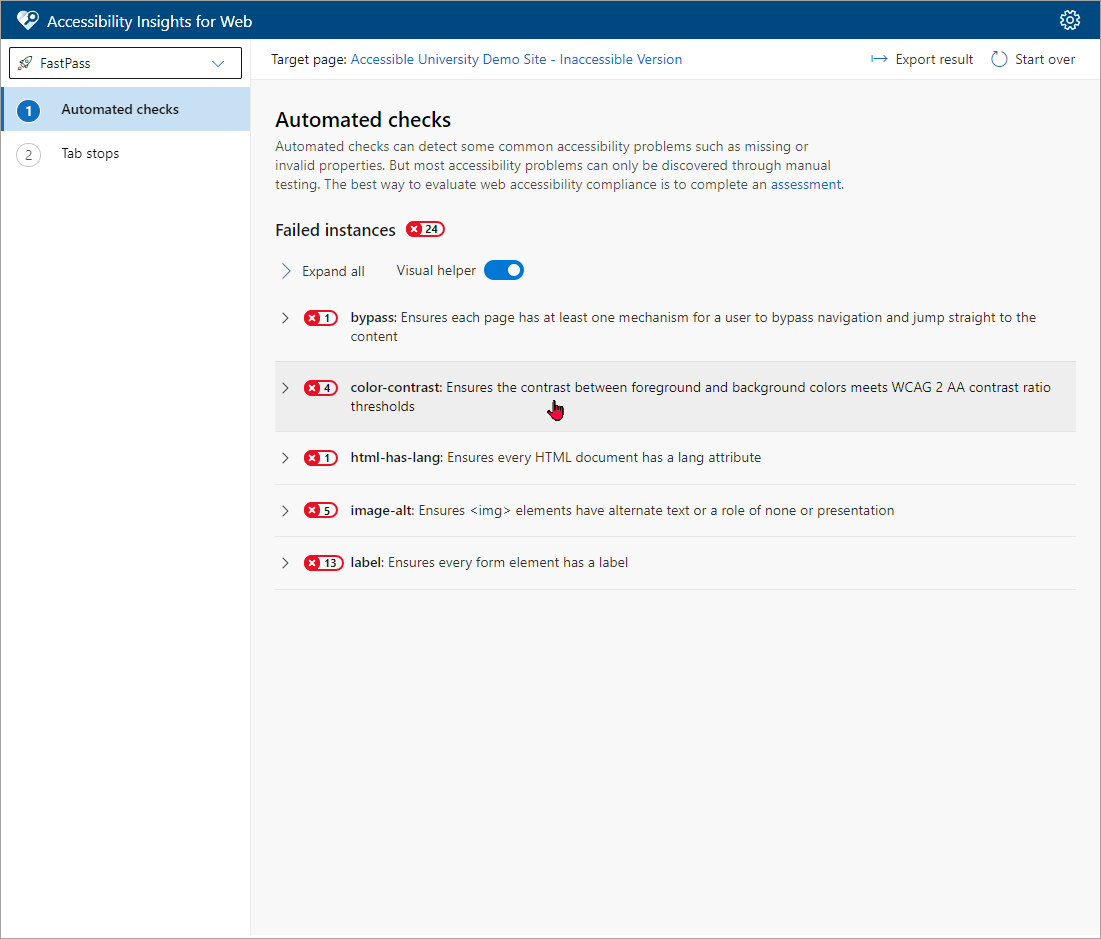
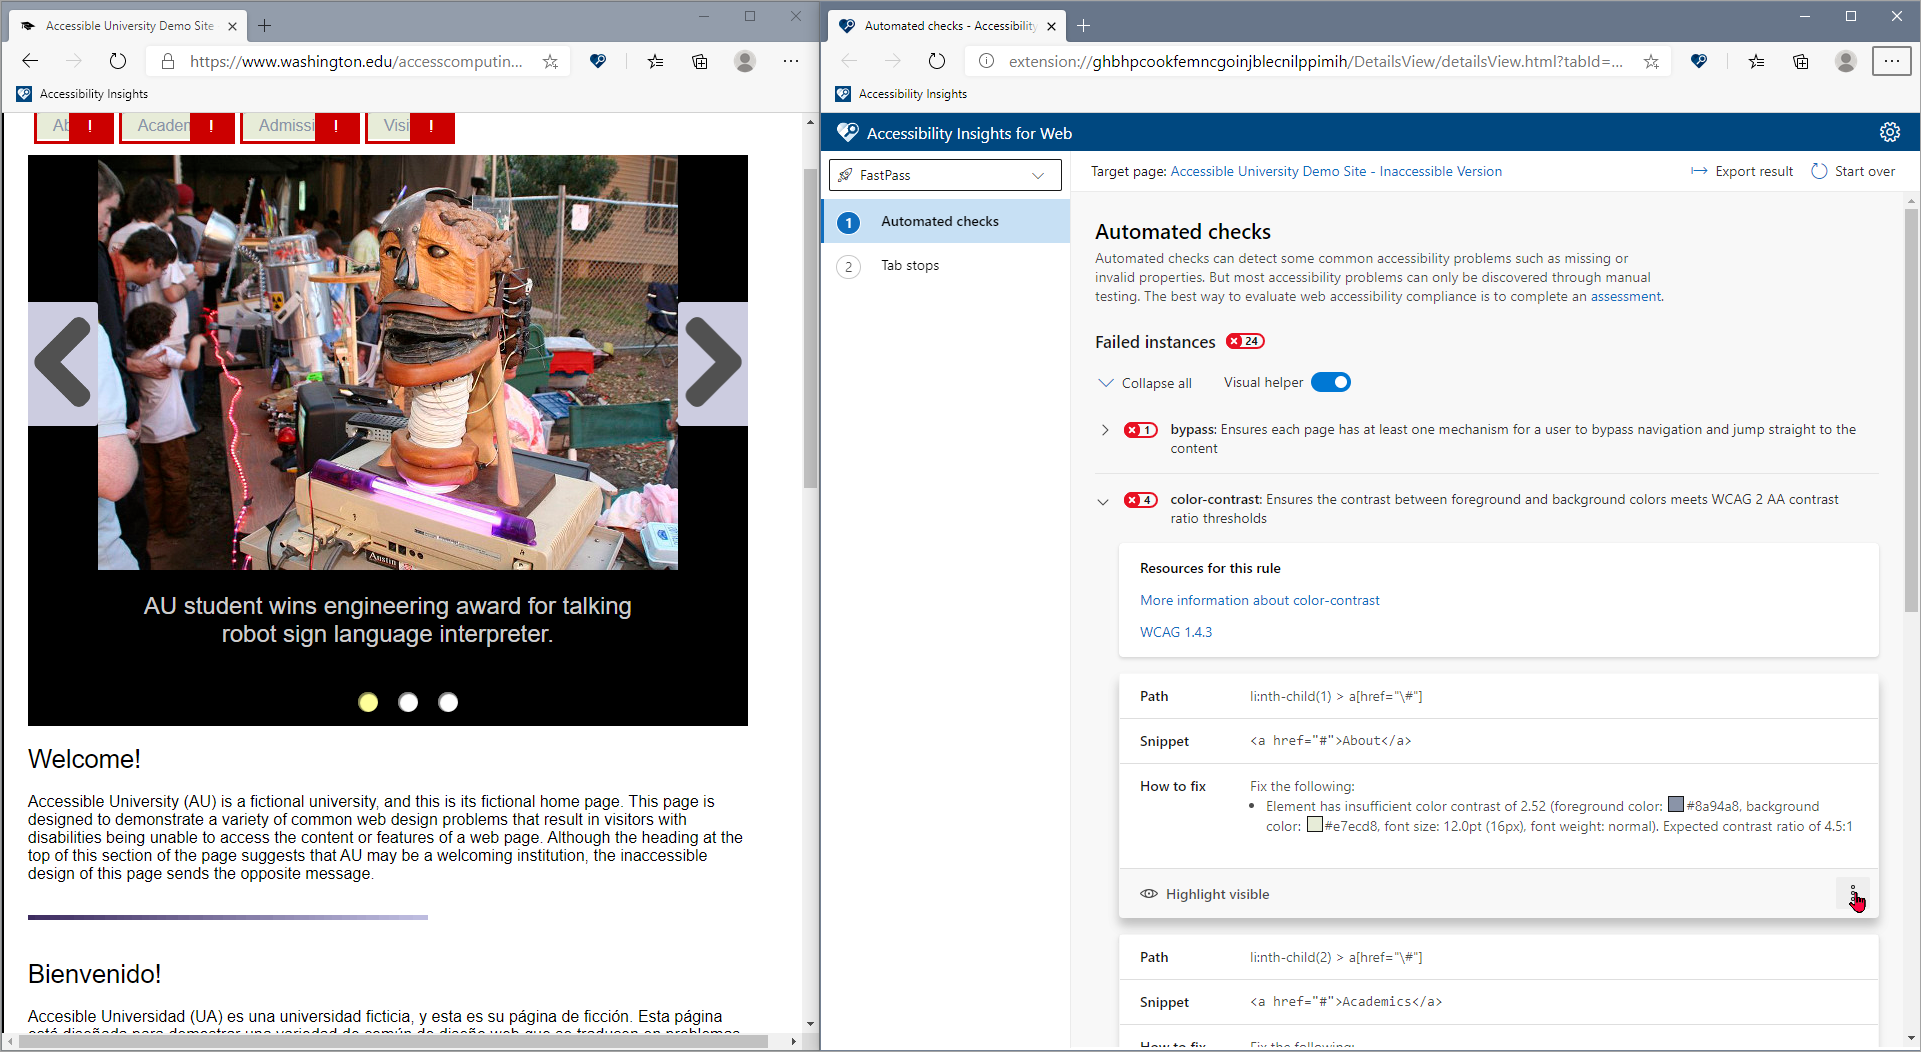
A rule can be expanded to show information about its failed instances. Rules can be expanded or collapsed:
- All at once by using Expand all / Collapse all
- Individually by clicking a rule, or by tabbing to it and pressing Enter
Expanding a rule:
- Shows links to additional information about the rule, including why it matters, examples, and detailed instructions for fixing
- Highlights its failed instances in the target page
- Shows the failed instances in a list
Each failed instance includes:
- The class name of the element that failed
- How to fix the detected issue
- Additional information to help identify the element (some rules only)
- A disclosure button that reveals more actions to take on the failed instance. You can:
- File an issue in your GitHub or Azure Boards repository.
- Copy failure details to your clipboard and paste them into the tool or document of your choice.
Selecting a failed instance highlights it in the target page. You can select multiple instances. An instance can be selected or deselected by clicking it, or by tabbing to it and pressing Enter.
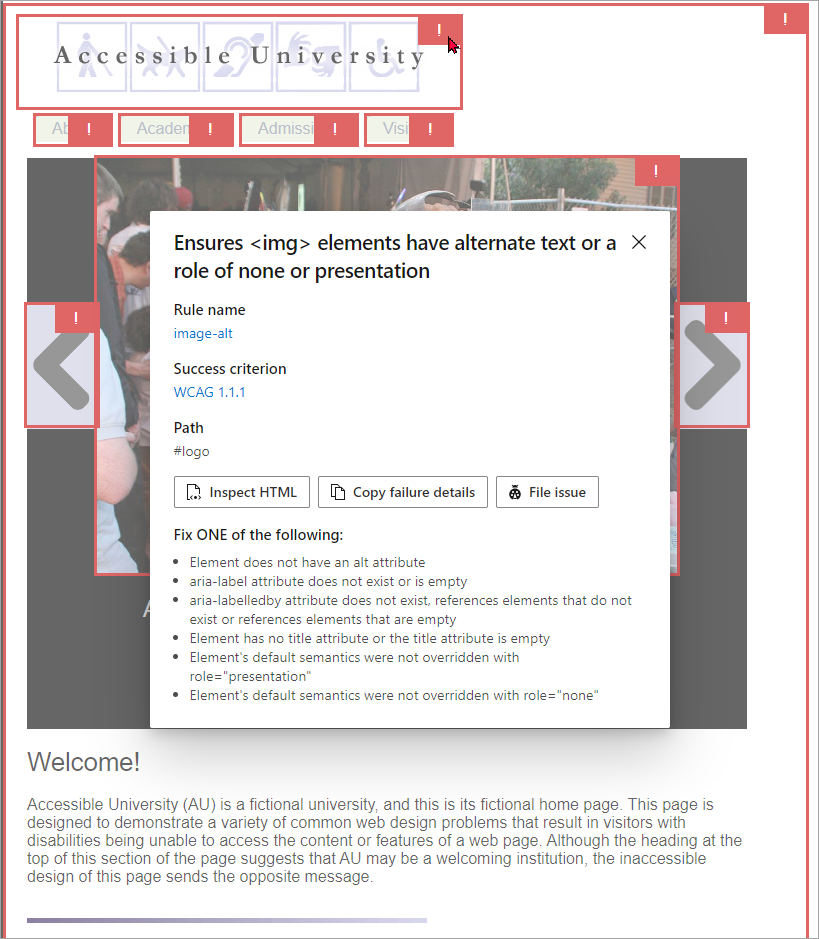
Review results in the target page
Selecting a failure icon opens a dialog with the following information:
- A description of the rule that failed
- The rule name, which links to detailed information about the rule
- The number of the relevant WCAG success criteria, which links to detailed information about the criterion
- The path to the element that generated the failure
- Three buttons:
- Inspect HTML takes you directly to the element's code. (You must open the Dev Tools panel to enable this button.)
- Copy failure details copies all of the details to your computer's clipboard.
- File issue allows you to easily file an issue on GitHub or Azure Boards.
- Instructions for fixing the problem
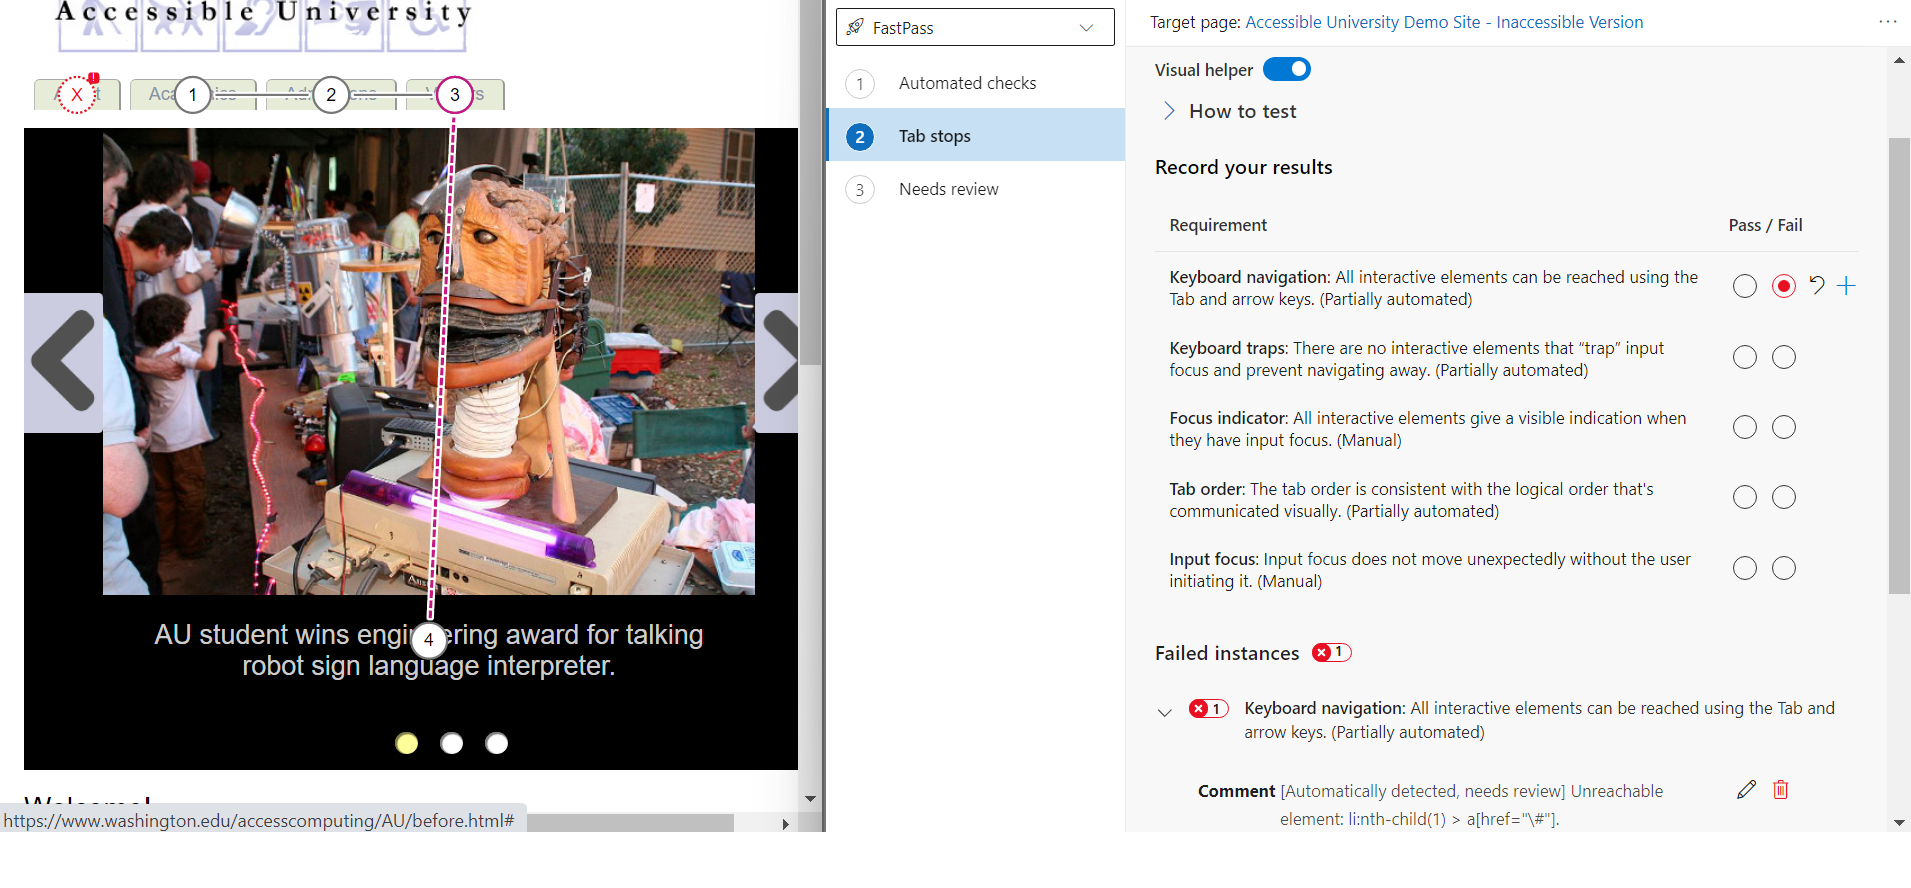
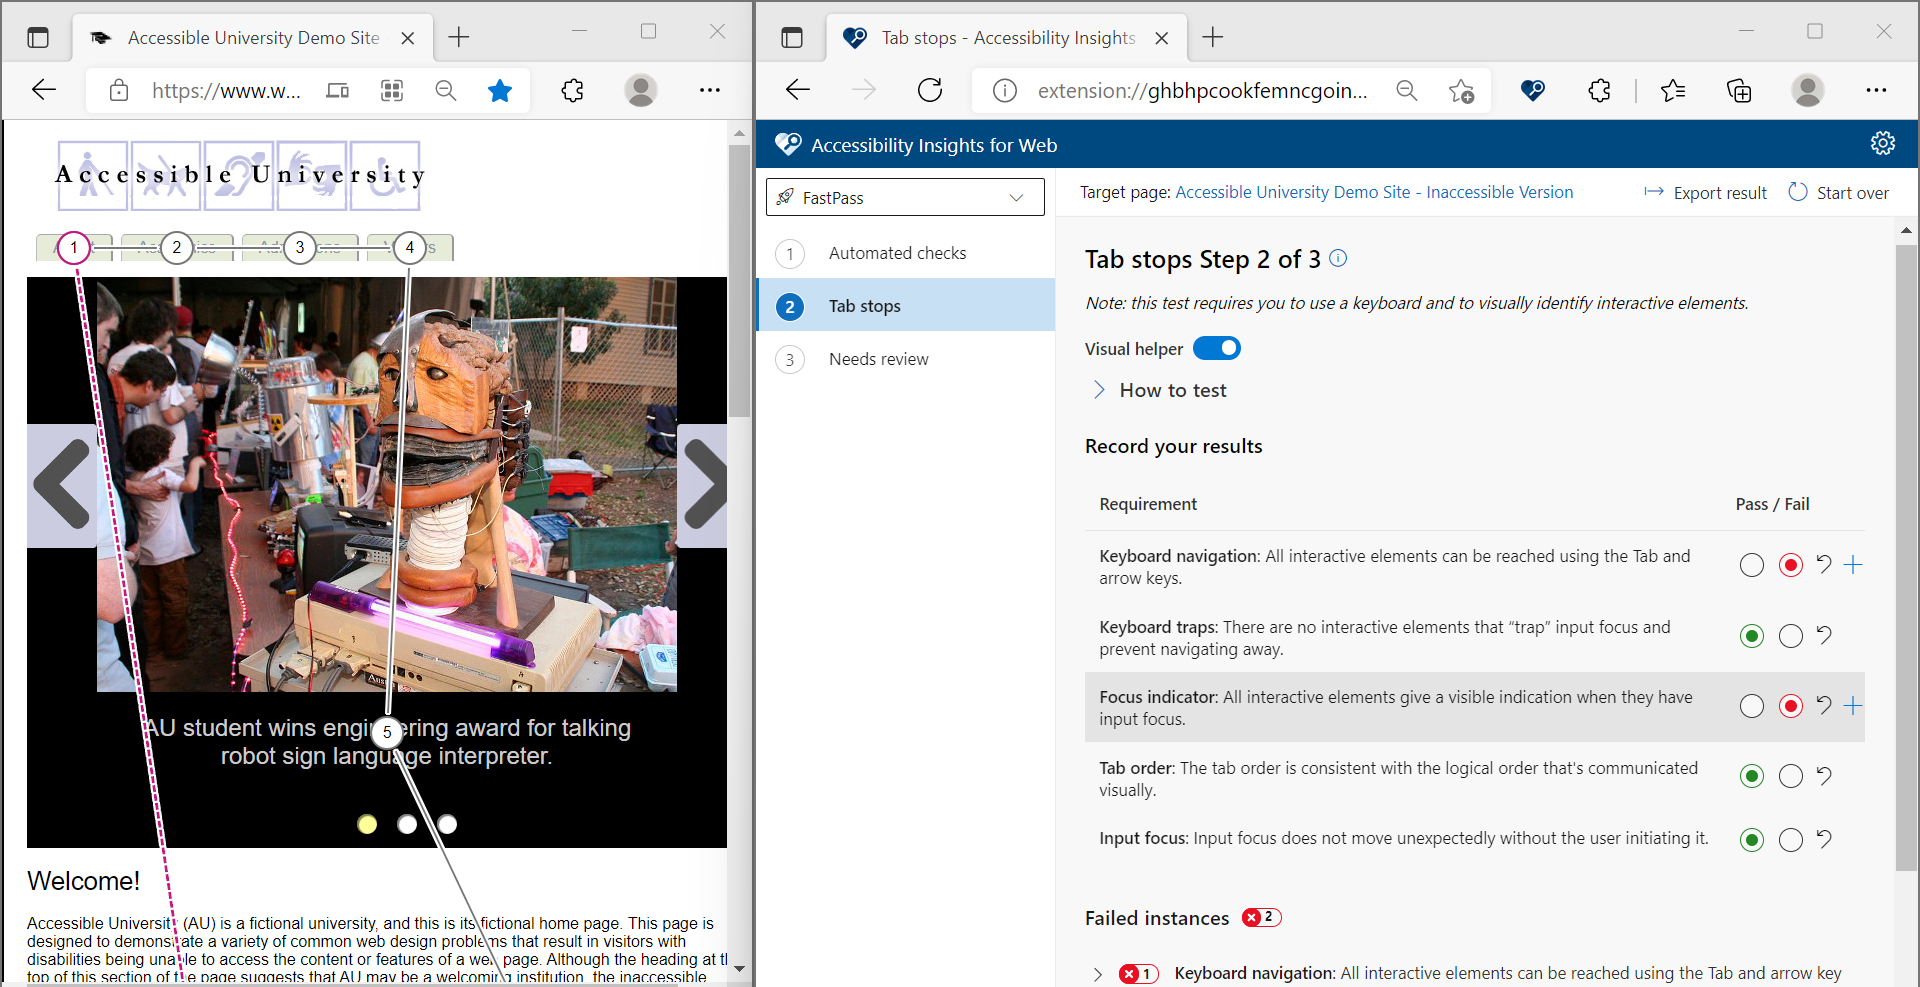
Complete the assisted test for Tab stops
-
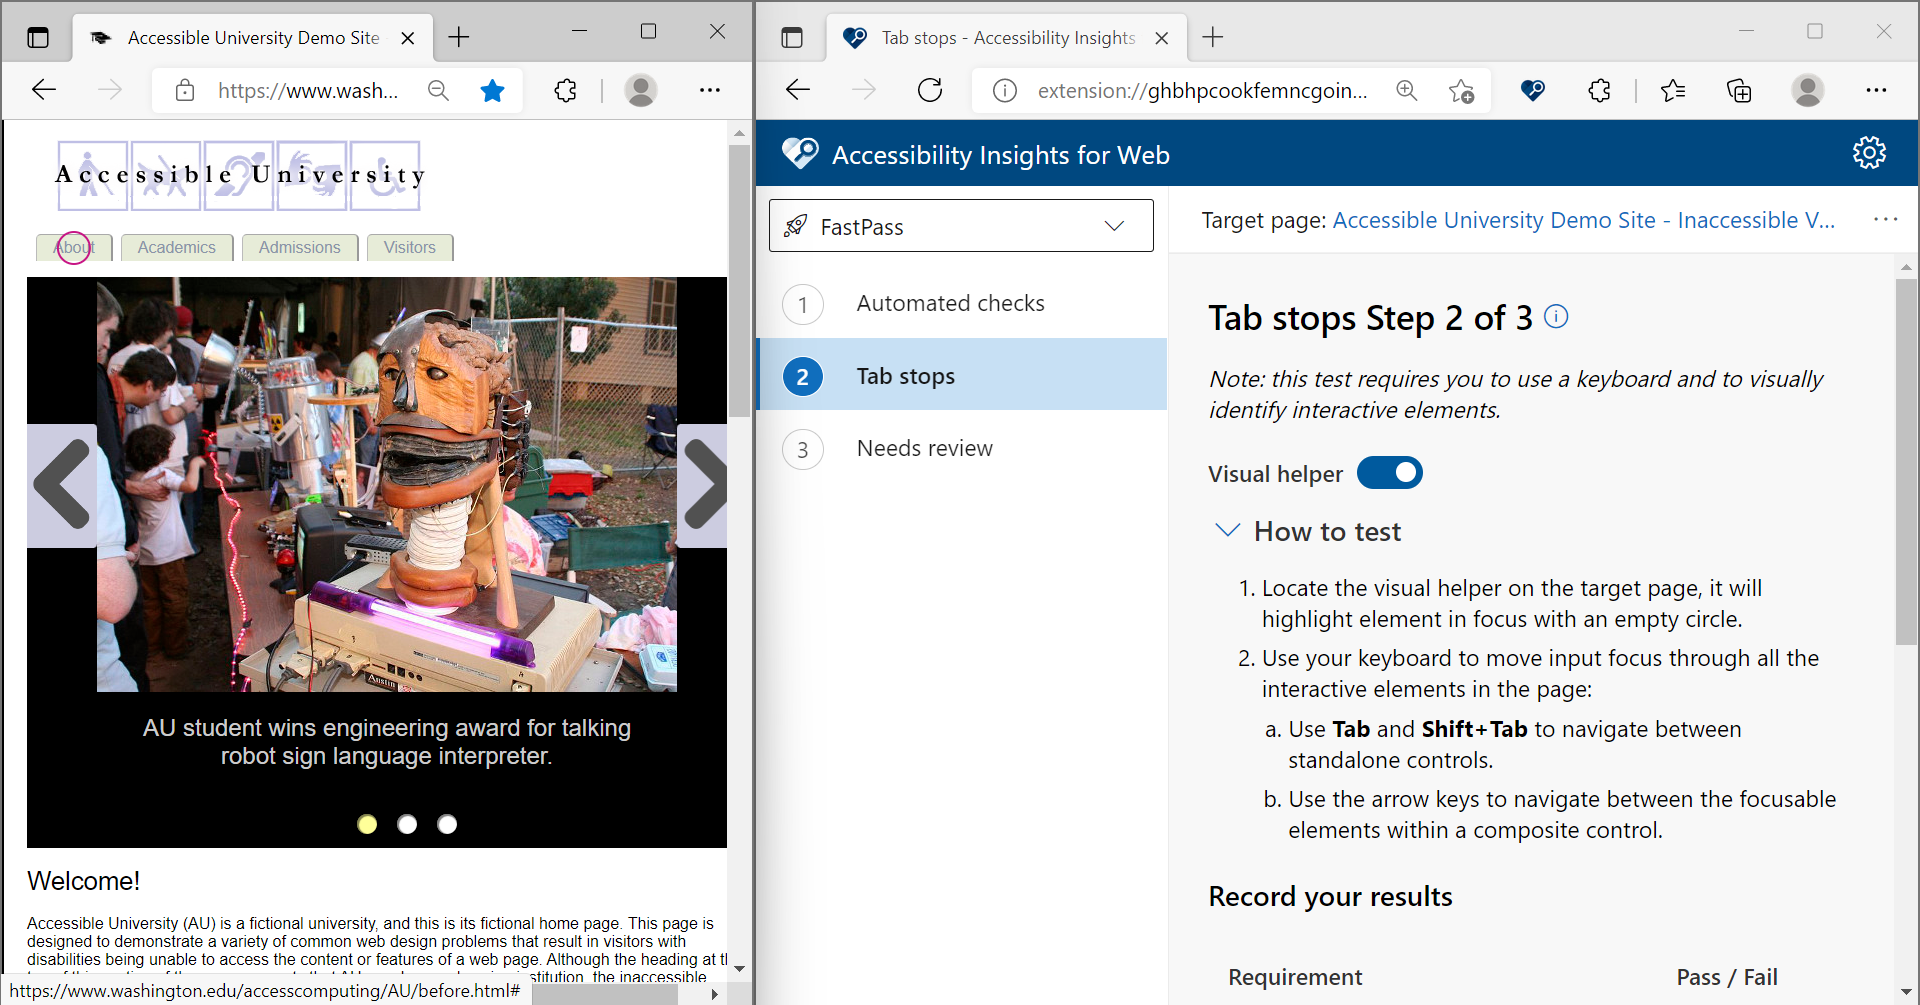
In the navigation pane, select Tab stops.
-
Refresh the target page to put it into its default state.
-
In Tab stops, turn on the Show tab stops toggle.
An empty circle will highlight the element that has input focus. It might be necessary to tab once to move focus into the page.
-
Use standard keyboard commands to move input focus through all the interactive elements in the page:
- Use the Tab key and Shift+Tab key to navigate between controls.
- Use the arrow keys to navigate between the focusable elements within a composite control, such as the items in a menu.
As you navigate away from each element, its place in the tab order will be displayed as a number.
-
As you navigate through the elements, look for these accessibility problems:
- An interactive element can't be reached using the Tab or arrow keys.
- An interactive element "traps" input focus and prevents navigating away.
- An interactive element doesn't give a visible indication when it has input focus.
- The focus order is inconsistent with the logical order that's communicated visually.
- Input focus moves unexpectedly without the user initiating it.
Review the partial automation results in the Accessibility Insights for Web page
In some cases, the Tab stops test is able to automatically detect possible Tab stops issues.
A dialog will appear in the Tab stops page indicating that Possible failures were auto-detected after you have completed the navigation through the elements and returned to the Accessibility Insights for Web page.
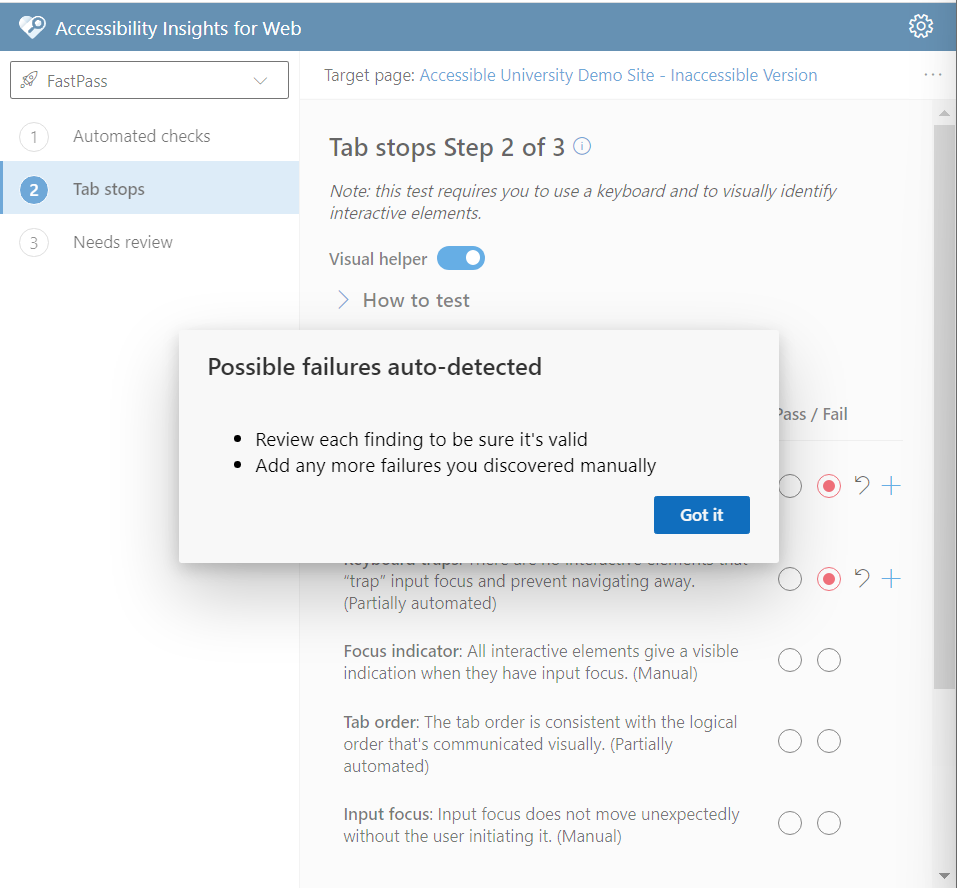
These possible issues are highlighted directly in the target page and described in the Accessibility Insights for Web page.
A possible Tab stops failure auto-detected will:
- Mark the requirement as Fail
- Add a failure instance for that rule
Each automatic failure instance includes:
- A note that the issue was automatically detected and needs a human to review
- A short description on why this element was added (e.g. Unreachable element)
- The path to the element that generated the failure
- An Edit button that allows you to edit the information on the failure instance
- A Delete button that allows you to delete that instance
Note: Turning the visual helper on / off will show / hide the visualizations and previously found automatic instances. You can use the Start Over button to restart the Tab stops test
Record your results
After reviewing any partial automation results, record your results by marking each requirement as Pass or Fail. Optionally, if you find any failures, you can add a failure instance by selecting the + Add a failure instance button.
When you have completed the assisted test for Tab stops, your FastPass is complete.
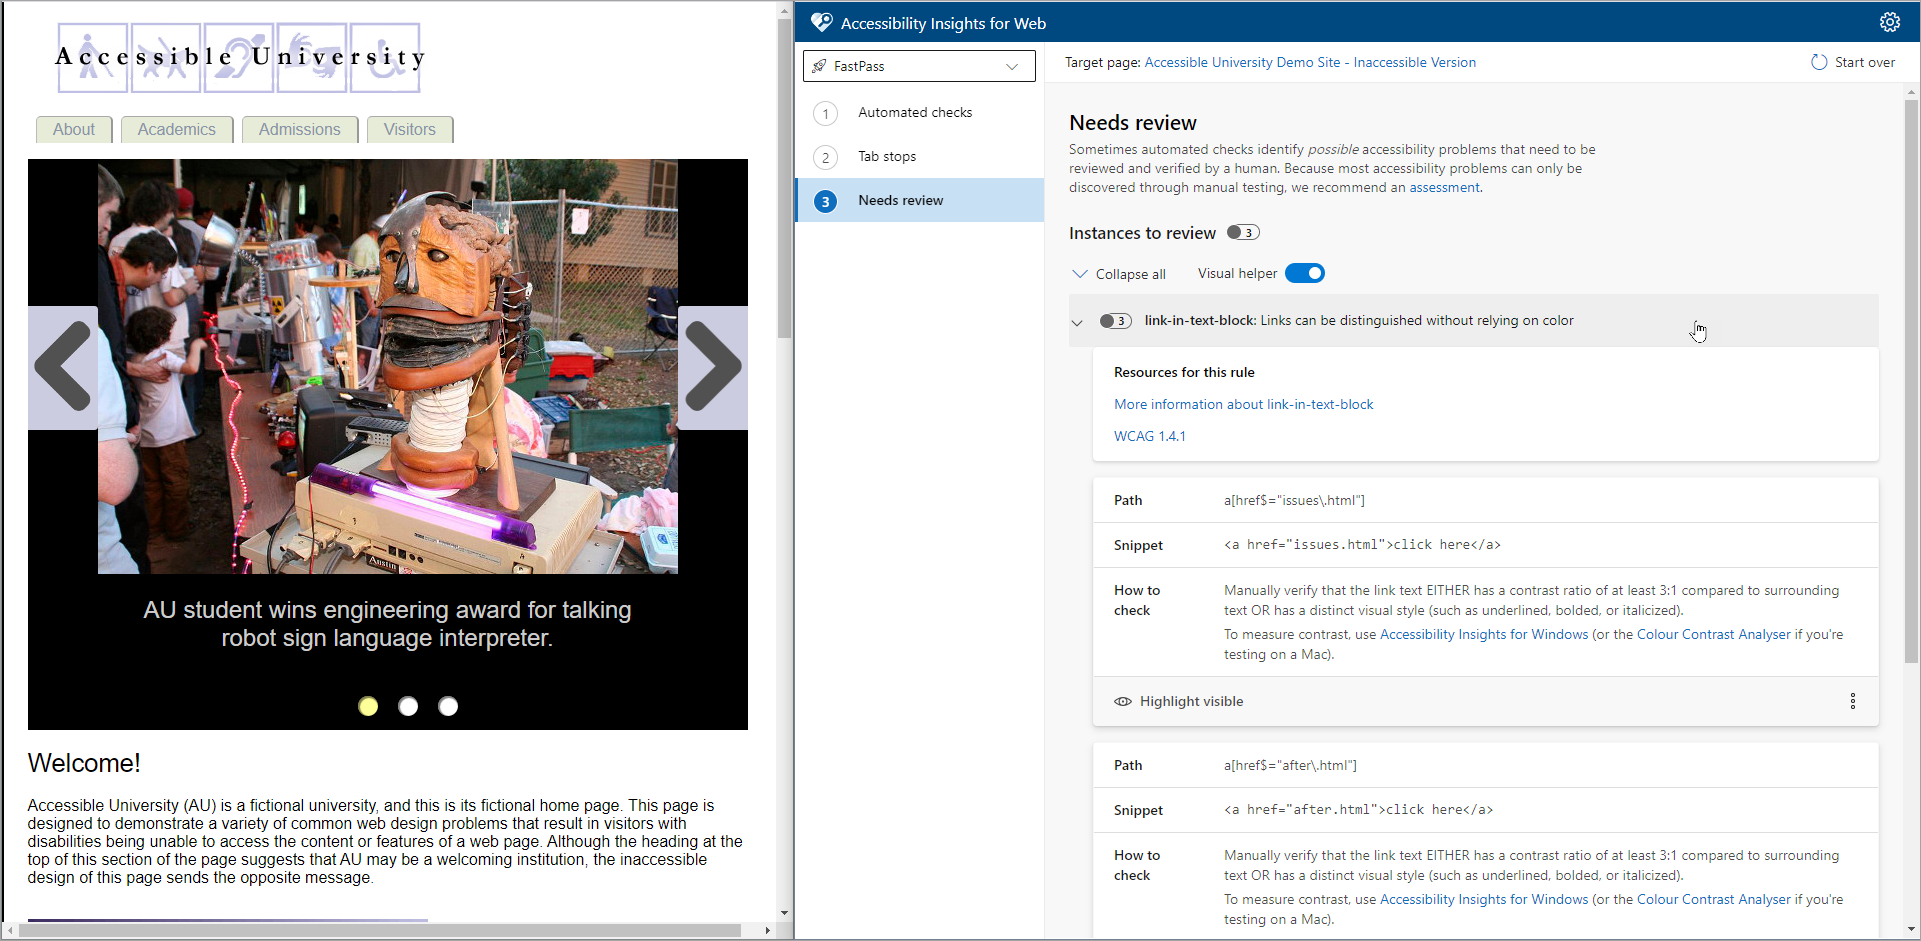
Optional: Evaluate instances that need review
Sometimes an automated check encounters an element coded in a way that it can't be evaluated automatically. For example, the color-contrast rule can't determine the contrast ratio of text that's superimposed on an image or gradient. Such instances need to be reviewed by a human to determine whether they pass or fail.
Show instances that need review
- In the navigation pane, select Needs review.
- In the command bar, select Start over. After a moment, any instances that need review will be displayed in the main panel.
- Expand a rule to see its instances.
- To determine whether an instance passes or fails, follow the How to check instructions.
Share a detailed report
-
In the command bar, select Export result.
- Optional: Provide a description to include in the report.
-
Use the browser's download bar to open the report or view the file location.